Pular para o conteúdo
Docs
  • Ticket no Helpdesk

Sales

4
  • How to check which seller is associated with an order?
  • How to Export Invoices in PDF
  • Post-Sale Email Configuration
  • How to Recreate a Child Order ?

Catalog

22
  • Sales region setup
  • How to create a virtual product ?
  • How to Add Related Products to Your Listing
  • How to Add an Attribute Inside an Attribute Group
  • How to Create Custom Options in Products
  • How to Create an Attribute Group
  • How to Create a Default Attribute on the Platform
  • How to Add or Edit Attribute Options in Your Catalog
  • How to Select Attributes for Products
  • How to Activate a Product for Sale in the Multiseller Model
  • How to Change Product Visibility in the Marketplace
  • How to Add Additional Days to Shipping
  • How to Remove a Category from the Filter Listing
  • Seal Configuration on the Website
  • How to Update Attributes in Bulk Through the Admin Panel
  • How to Add or Remove the Minimum Sales Quantity of a Product
  • How to create a grouped product?
  • How to create a simple product ?
  • Categories
    • How to Create a Carousel Product Grid on the Homepage?
    • How to Change the Name of a Category?
    • How to Include a Custom Description in Categories
    • How to Change the Order of Products in Categories

Documentação para o Time Interno da Soul

1
  • Two-Factor Authentication Activation

Promotions

7
  • How to Create and Configure Promotion Rules with Free Gifts
  • Discount Configuration for MultiSeller Marketplace (Original to Sale Price Model)
  • How to Create a Discount Coupon?
  • How to Create a Discount Rule Without a Coupon ?
  • Discount Rule Templates
  • Abandoned Cart Creation and Configuration
  • How to Create a Discount Coupon for an Abandoned Cart

Content

8
  • How to Create a Grouped Product?
  • How to Add Recipients to Forms
  • HOW TO CONFIGURE BLOG PRO
  • How to verify received forms
  • How to Create an Email Template with a Coupon for an Abandoned Cart
  • How to Change Field Requirements in Forms on the Platform
  • How to Change Home Page Banners
  • How to Check Received Forms

Seo/Marketing

1
  • How the Synonyms Feature Works in SEO

Marketplace

3
  • How to Allow or Restrict Purchases from Multiple Sellers in the Same Cart
  • How to Create, Disable, or Delete an Address in the Store Locator of the Soul Marketplace ?
  • Identifying the Seller Associated with an Order

Communications

2
  • How do I enable or disable comments on products?
  • How to enable the WhatsApp button

Reports

5
  • Adding Variables and Parent Order Fields to the Report
  • How to view the approved orders report
  • How to View the Abandoned Cart Report ?
  • How to View the Most Viewed Products Report
  • How to View the Best-Selling Products Report

System

6
  • How to check the records of new updates or improvements to the Marketplace?
  • How to Register Error Logs for Order Creation Attempts
  • How to Enable the Vertical Layout in Checkout
  • Display quote-only products only after priced products
  • How to Create an Administrative API User
  • New Tax Amount Display Feature

Seller Dashboard

5
  • How to Log in as a Reseller?
  • How to approve or disapprove a seller profile
  • Activating or Deactivating a Seller’s Store
  • New free shipping configuration in the reseller pane
  • How to change the free shipping field of the product via spreadsheet?

First Steps

1
  • How to Set Up Google Two-Factor Authentication
Ver categorias

How to enable the WhatsApp button

< 1 minutos de leitura

The following documentation will show you the step-by-step process to enable the WhatsApp button in your marketplace.

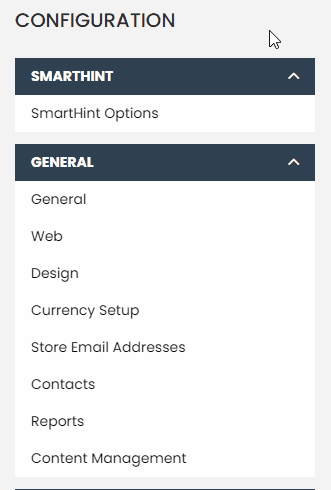
First, navigate through the side menu to the “Systems” tab. When you select “Systems,” a new submenu will appear. In this submenu, click on “Settings.”

After the page has loaded, look for the ‘WhatsApp Contacts’ tab. Click on this tab to open a new page.

If the functionality is disabled, click on ‘Enable‘ to activate it.

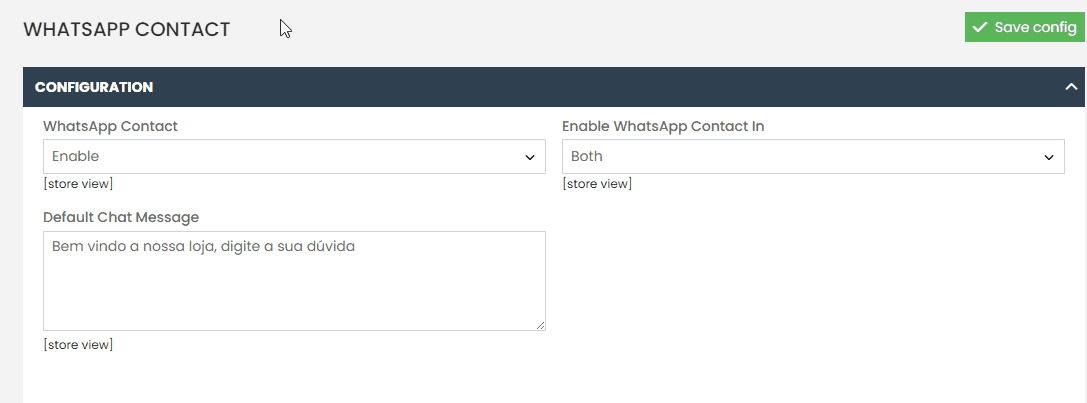
“Then, select the option ‘WhatsApp Contact Button Settings‘ to access all the settings for this functionality. In the list of options, locate ‘Contact Mobile Number’ and enter your phone number.

Finally, don’t forget to click the green ‘Save Configuration‘ button located in the upper right corner of the screen.”


Do not enter the phone number as shown in the image. Instead, fill in the field with your own phone number.

Done! With this step-by-step guide, you will be able to enable the WhatsApp icon on your platform. If you encounter any difficulties or have any questions, don’t hesitate to contact our support team. We are always available to help!

Quais são seus sentimentos
Atualizado em 5 de junho de 2025
How RMA requests work
© 2026 Docs • Built with GeneratePress