The store locator functionality of the Soul platform allows you to list multiple addresses, whether they are your own stores, your resellers (if you have them in your marketplace), or technical assistance centers (if you offer products that require special service). Regardless of the address, this feature enables you to list all the necessary information so that your customer can contact a physical location or view your address on the Google map.
Below, you will find a video and a written step-by-step guide to help you create, disable, or delete an address in the store locator. Feel free to choose between the two options. If you have any questions or difficulties, please contact our support team. We are here to help!
How to create a new address? #
First, access your Marketplace’s administration panel. Then, navigate through the side menu to the “Marketplace” option. A new submenu will appear; navigate through this new submenu and click on the “Store Locator” option.
Wait for the page to load, where all created addresses will be listed for you.
In the upper right corner of the loaded page, click the blue button called “Add Location” to create a new address.
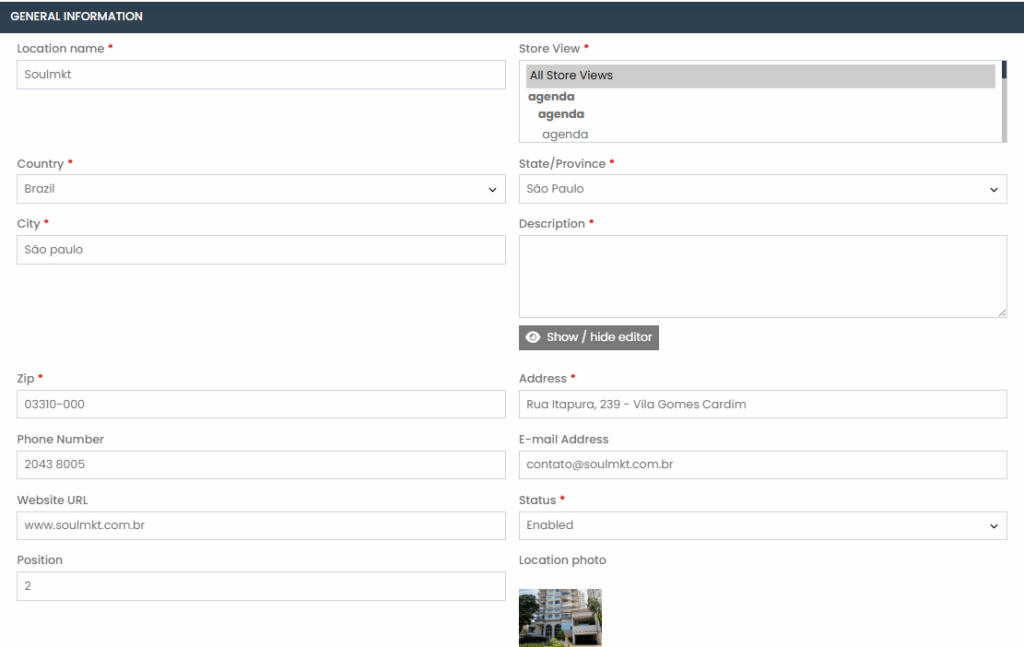
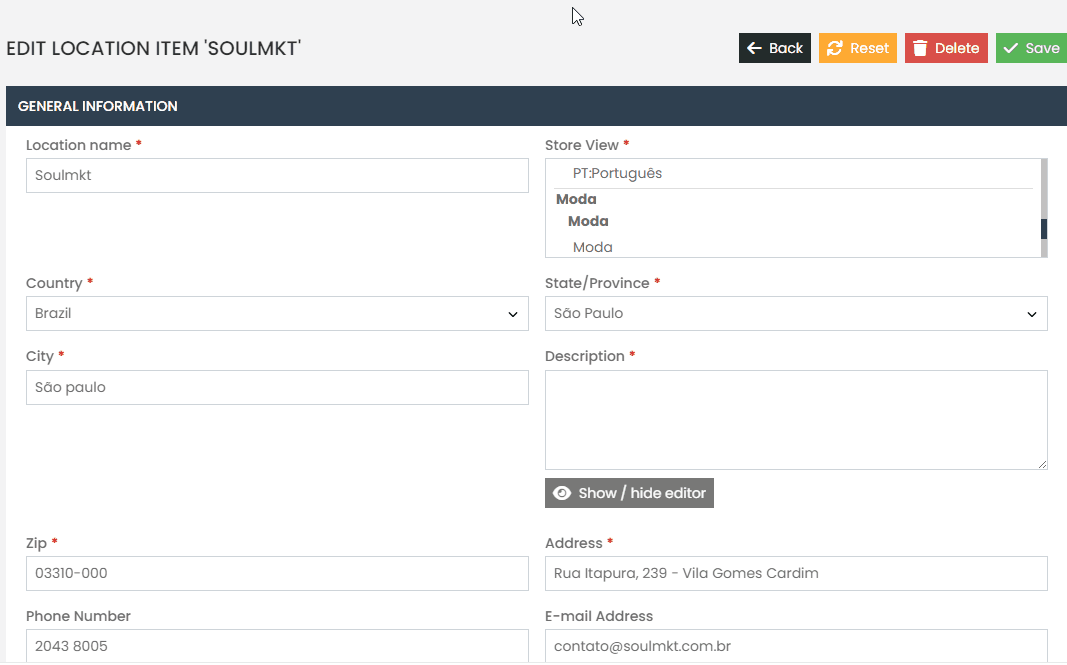
Fill in all the required information, represented by a red asterisk next to the field.
- Location Name*: Enter the name of the store, address, or desired location.
- Store View*: Select the store view where you want this address to appear. For example, if you have two store views—one for the site in Portuguese (pt-br) and another for the site in English (eng)—select only the pt-br option if you want the address to appear only on the Portuguese site. If you want the address to appear in all store views, select the “All store views” option.
- Country*: Select the country of the address. For example, if it’s an address in Brazil, choose Brazil as the country.
- State*: After selecting the country, the state option will become available with a list of all states. Choose the corresponding state for the address you are registering.
- City*: Enter the name of the city for the address you are registering.
- Description*: Add a description with useful information about the address, such as service hours, special conditions, location accessibility, etc.
- Phone Number: Not mandatory, but it is recommended to fill it in if the address has phone service.
- Email Address: Not mandatory, but it is recommended to fill it in if the address has email support.
- Website URL: If the store at the address has a website, enter the URL of this site. For example, if you are registering an address for a reseller that has a website, enter the site’s URL.
- Status: Mark as “Enabled” for the address to be visible on the store locator page. Mark as “Disabled” for the address to no longer be visible on the store locator page.
- Position: Determines the position of the address in the store locator. If you want the address to appear first in the listing, set the value to 0. All values after 0 will be listed below it. For example, Store 1 with position 0 will appear above Store 2 with position 1.
- Location Photo: Add a photo of the location if available. We recommend uploading images up to 200KB in file size, with dimensions of 1200×768, in JPG format.
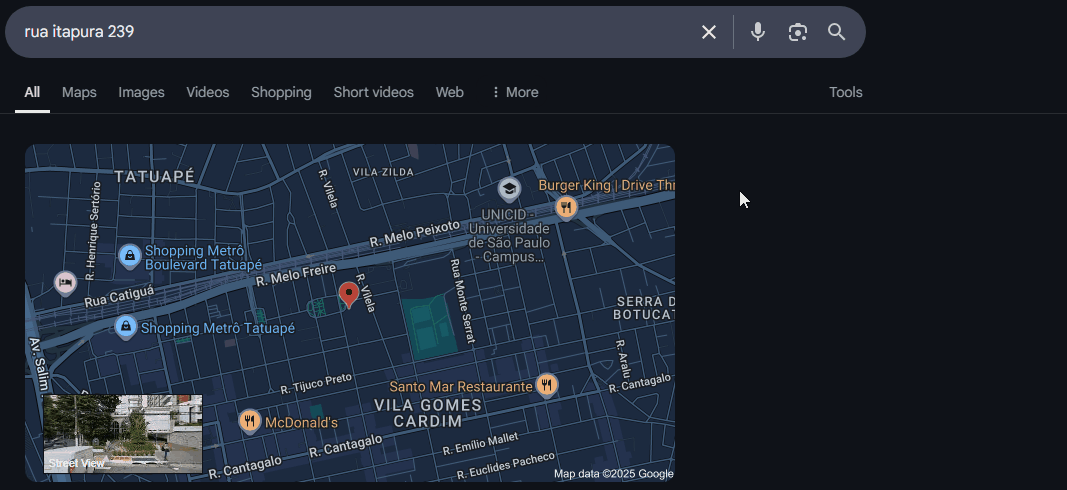
In the “Map Location” setting, fill in the latitude and longitude fields with the respective values of the address you are registering.

To find the latitude and longitude of your address, search for the address on Google, then click on “Maps” to open Google Maps.
On the red marker that appears over the address in Google Maps, right-click and copy the latitude and longitude values. Remember that latitude is always the smaller value, and longitude is always the larger value.
In the “Available Products” setting, leave it marked as “All products.”

In the “Available Categories” setting, leave it marked as “All categories.”

Don’t forget to click “Save” once you have completed all the settings!
How to disable an address? #
To disable an address, access the address you want to disable and, in the “Status” option, change the value to “Disabled.”
How to delete an address? #
To delete an address, access the address you want to remove and, in the upper right corner, click the red button labeled “Delete.”

Done! With this step-by-step guide, you will be able to create new addresses, disable or delete them in your store locator! If you encounter any difficulties or have any questions, please contact our support team. We are always here to help!