An attribute group is a way to segment different types of products in your store. For example:
- If you sell clothing and food, you can create an attribute group for clothing, containing only attributes related to it, and another for food, with corresponding attributes. This segmentation helps organize and manage products more efficiently.
Add an Attribute to the Group #
- Navigate the Menu
- In the side menu, go to: Catalog > Attribute Management > Attribute Sets..
- Select the Attribute Set
- From the listed groups, choose the set where you want to include the attribute.
- In most cases, the default group used is “Defaults”. We will use this as an example.
- Locate the Created Attribute
In the list of unassigned attributes, look for the attribute you previously created. In this example, the created attribute was size-cloathing.
- Move the Attribute to the Desired Group
Click and drag the attribute to the corresponding section within the group, such as “ProductData”.

- Save the Changes
After organizing the attributes, click on “Save Attribute Set”.

Validation #
- Check on the Product
- Access a test product on the platform.
- Navigate to the section where the attribute was added.
- Verify that the attribute appears correctly.
Select and Save the Attribute
- Select an attribute option .
- Click on “Save “.
Check on the Storefront
- Verify that the attribute appears correctly on the store view.
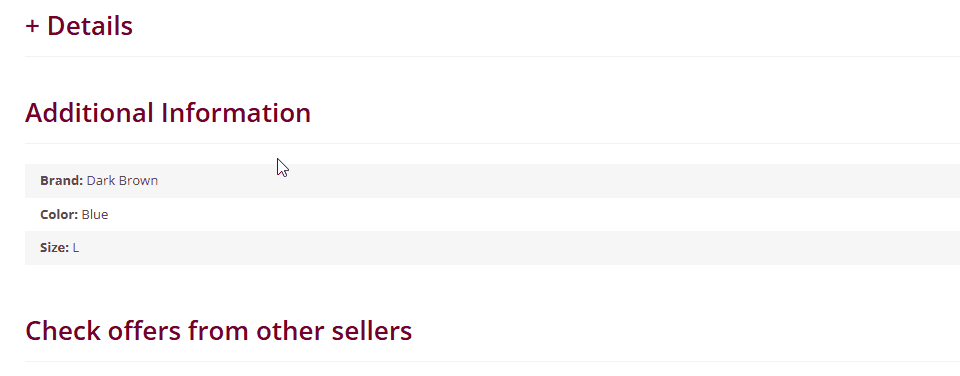
By following the steps above, you will be able to add attributes to attribute sets on the Marketplace platform in a simple and efficient way.
If you encounter any issues or have questions during the process, please open a ticket in the support panel. Our team will be available to assist you.