In this tutorial, you will learn how to enable error logging for orders placed during the checkout process on your platform.
These logs record errors related to orders that could not be completed due to inconsistencies or issues with payment methods.
In cases where failures are identified, it is recommended to open a ticket directly with the support team of the payment provider used.
Step-by-Step Guide #
Accessing the Core Menu #
First method:
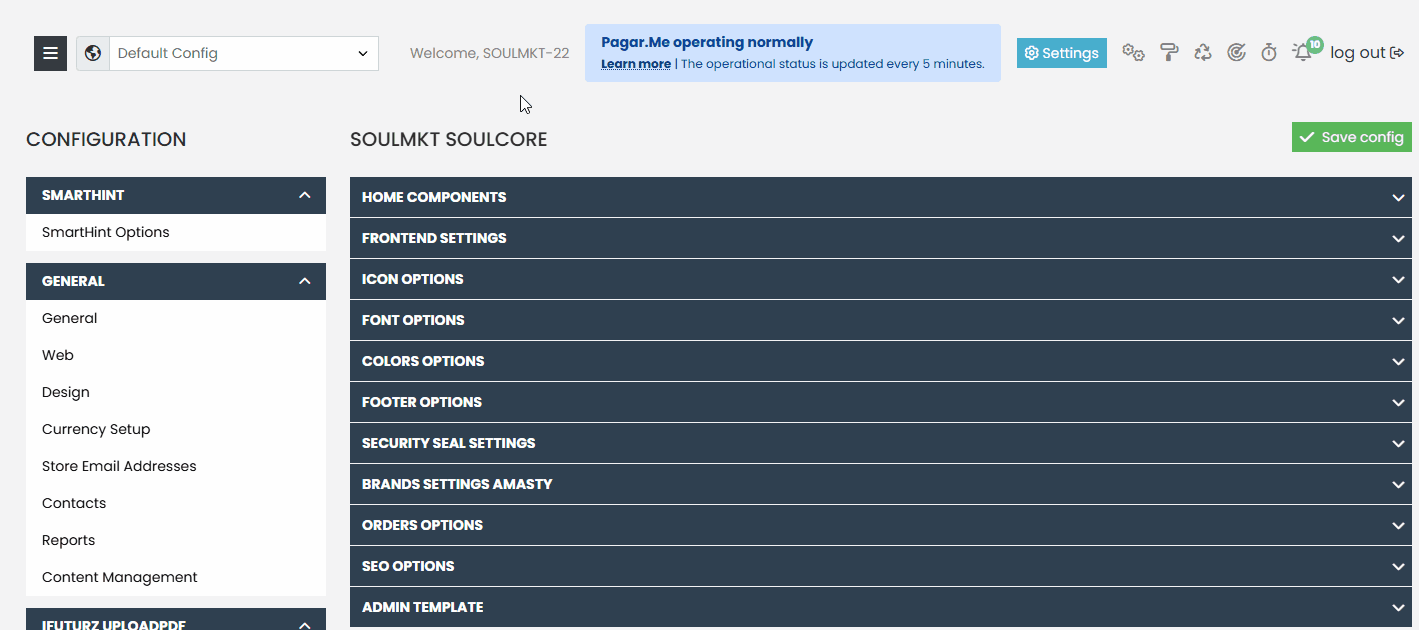
- In the side menu, hover over the Systems tab (clicking is not necessary).
- When the submenu appears, click on Settings.
- On the new page, locate the Soulmkt Extensions section and click on Soulmkt SoulCore.

Second method:
- Click the paint roller icon located in the upper right corner of the page.
How to Enable Error Logging #
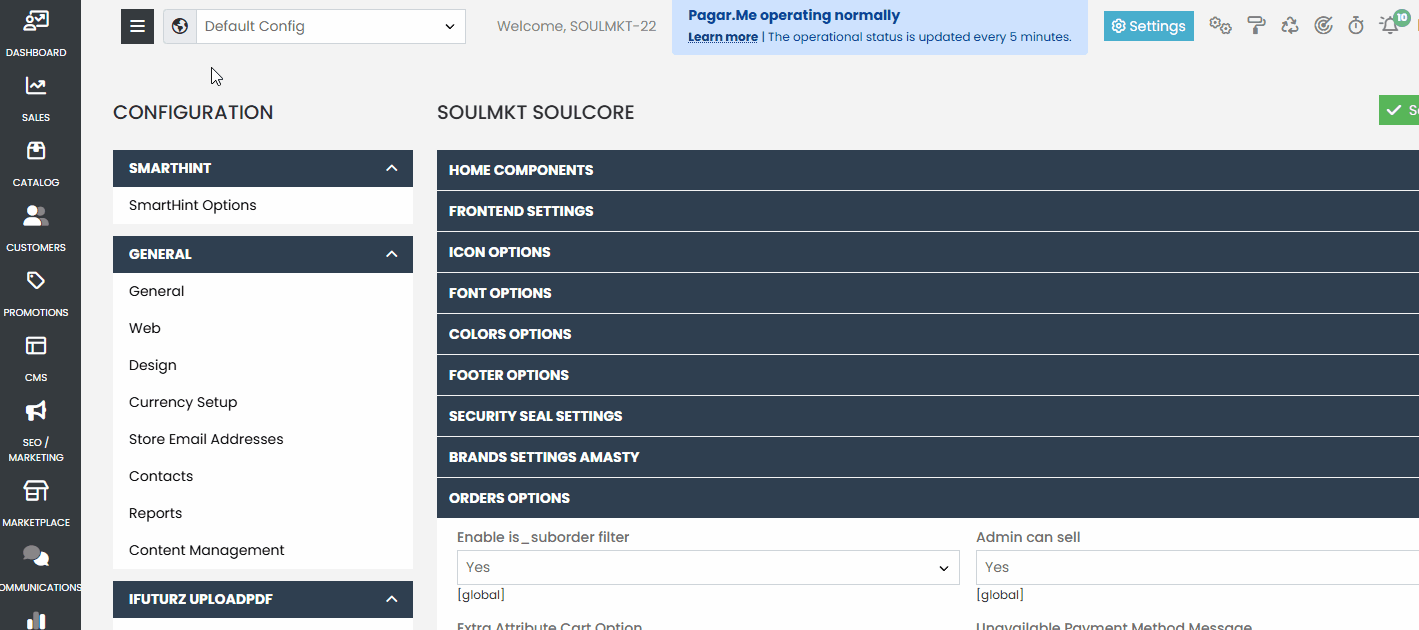
- In the Soulmkt SoulCore menu, go to the Orders Options submenu.
- Look for the Enable Error Order Log option.
- To activate error logging, select “Yes”; to deactivate it, select “No”.
- After making your selection, click the Save Config button.
How to Access the Error Log Menu #
- In the side menu, hover over the Sales tab (clicking is not necessary).
- If error logging has been correctly enabled, the Failure Log option will appear.
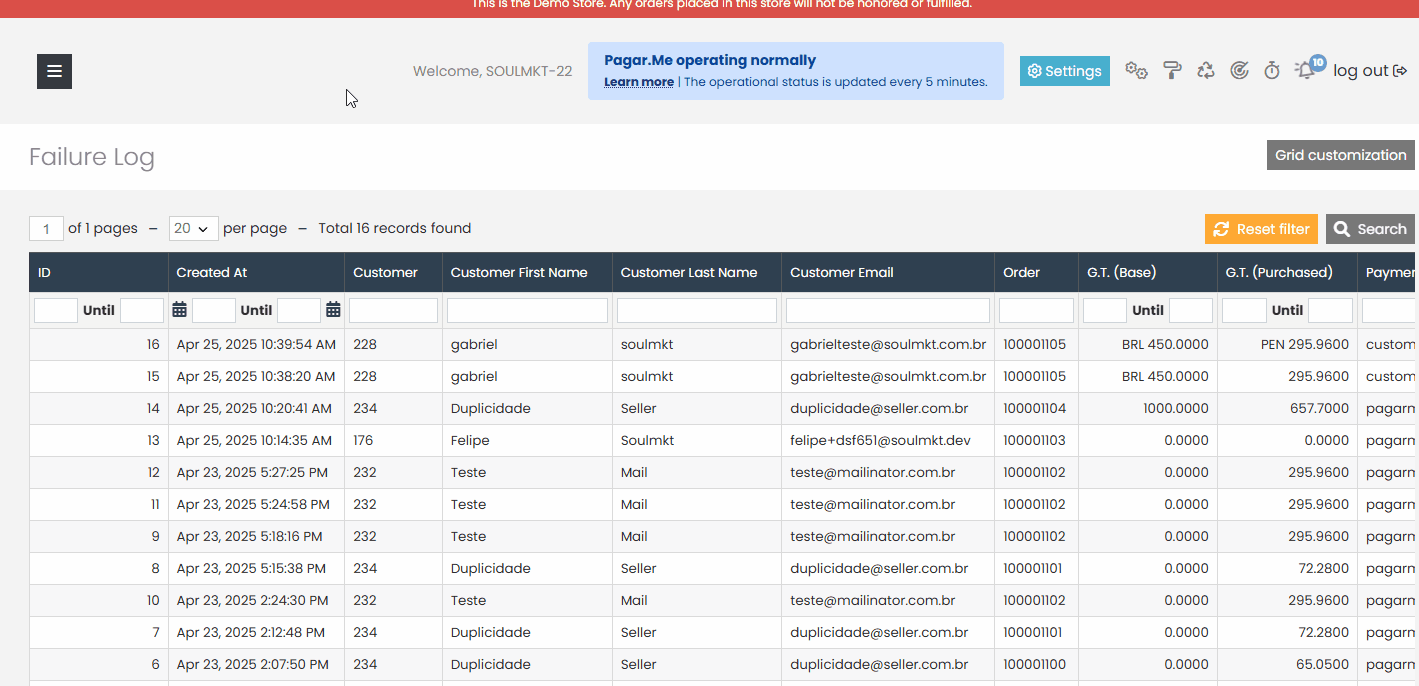
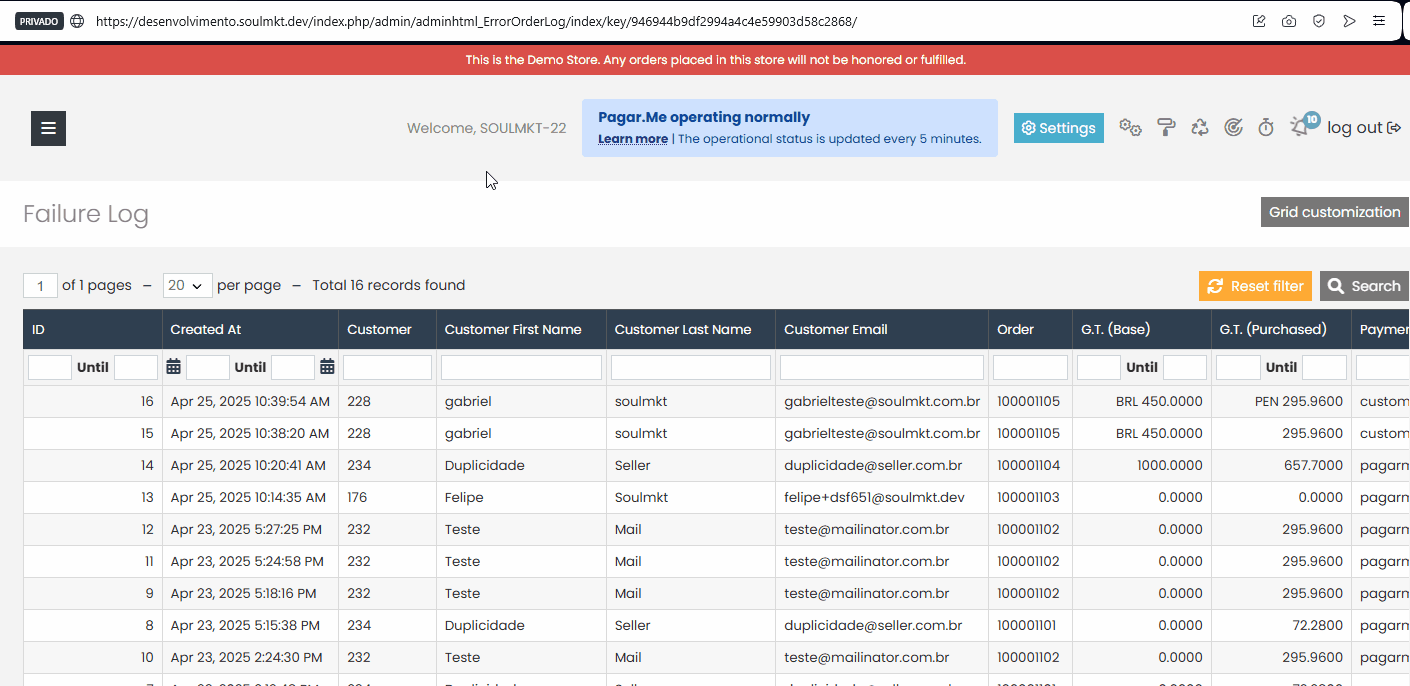
- Click on Failure Log to access the recorded error entries.
Understanding What Is Registered in the Error Log #
- Inside the Failure Log menu, all order attempts that encountered an error will be recorded from the moment error logging was enabled.
- If the configuration is later disabled, the system will stop recording new error entries.
- The log records purchase attempts that were not completed, such as payment failures with credit cards.
- In each log entry, it is possible to view:
- Customer information;
- Base price and converted price (according to the negotiation currency);
- Products related to the purchase attempt.
If the error logging functionality is disabled, the Failure Log menu will automatically disappear from the system.
Even if someone tries to access the menu URL directly, the system will block the access and display an “Access Denied” message.
If you need assistance, please open a ticket through the support panel. Our team is available to help you!